I’ve been in the thick of social media for, I want to say the last decade. Platforms like Instagram, Youtube, and Tiktok are regulars in my daily life. Not only is my brand aligned to those platforms, but I’m also a twenty-something living in the world. And as a digital content creator, I kind of live and breathe social media.
I thought I knew everything about social media platforms. That is until I was face to face with LinkedIn. I’ve always viewed LinkedIn as a ‘professional’ social media that my brand doesn’t align with, so I never paid any mind to it.
When I started working as a Social Media Specialist at Product Gym, I realized I was gonna have to dive deep into the world of LinkedIn and learn about it quickly. And now, three months in, I can confidently say I’m (mostly) well versed on all things LinkedIn.
When it comes to LinkedIn, there are endless possibilities of what you can post. You can upload quick rants, reshare links, share pictures and videos; you get the gist. The more I used LinkedIn for PG I realized that there are a lot of ways to create and connect with people. And depending on your brand, some work better than others.
But as I did my research, I noticed that a lot of people and brands were posting slideshow-style posts with pictures and infographics. I thought it was a cool concept –– kind of like Instagram carousels –– but I thought nothing more of it.
I didn’t understand the power of the slideshow until a co-worker pointed it out to me. He mentioned how much of a success slideshows have been for him and his content and he urged me to try it out for PG. So I did.
But not without some research.
I started browsing different LinkedIn profiles of several brands and people creating content specifically for Linkedin. And I noticed that, across the board, slideshow-style posts got so much more engagement and reach than simple picture/video or text posts. Linkedin seems to like that format, no matter the kind of content or information contained in the slideshow.
I knew then and there that I needed to test slideshows out and see how our audience responded because if there’s a chance to get more engagement on your content, why not take it?
Ok, so I knew why I wanted to start uploading slideshows on LinkedIn, now all I needed to do was figure out how to upload them. At first, I thought it was as simple as uploading all the graphics at once and LinkedIn was going to take care of the rest –– kind of like Instagram. But, it turns out, LinkedIn does not take care of the rest.
There’s a crucial step to uploading slideshows on LinkedIn. And while it isn’t as simple as uploading to Instagram, it’s still pretty easy.
To upload slideshow posts to LinkedIn, all you have to do is create a PDF with the content you want to upload and then upload it. This might be a pretty obvious step for some, but it wasn’t for me. And I’m sure a few wandering souls are looking for LinkedIn slideshow answers on the internet as we speak. (Err, write?)
And, if you’re not familiar with the steps of creating a PDF for LinkedIn, don’t worry. I promise the process is simple. It’s so simple that I’m going to give you a quick rundown of how I create and upload slideshows so that you have a better idea and you can follow along when it’s your turn.
Step 1: Choose Your Content
The first step is pretty obvious: choose the content you want to include in your slideshow. It might be pictures, text, or a full infographic. Whatever it is, gather your content together and you’ll be ready for the next step.
Step 2: Create Your PDF
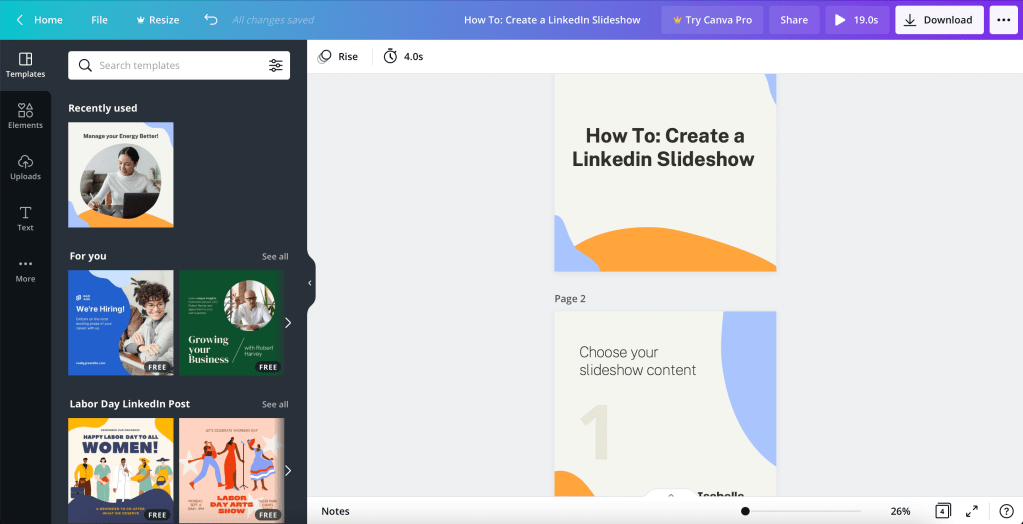
Now that you’ve compiled your content it’s time to turn it into a PDF.
To do this, I like to use Canva because it’s free and it’s the easiest software to use, IMO. Plus, if I need to create graphics, Canva has endless templates and tools to make my life easier. But feel free to choose the software that works best for you.
PDF building tool aside, you must make sure to create your PDF with the correct LinkedIn post dimensions. That will ensure that your slideshow fits into your feed and looks its best.
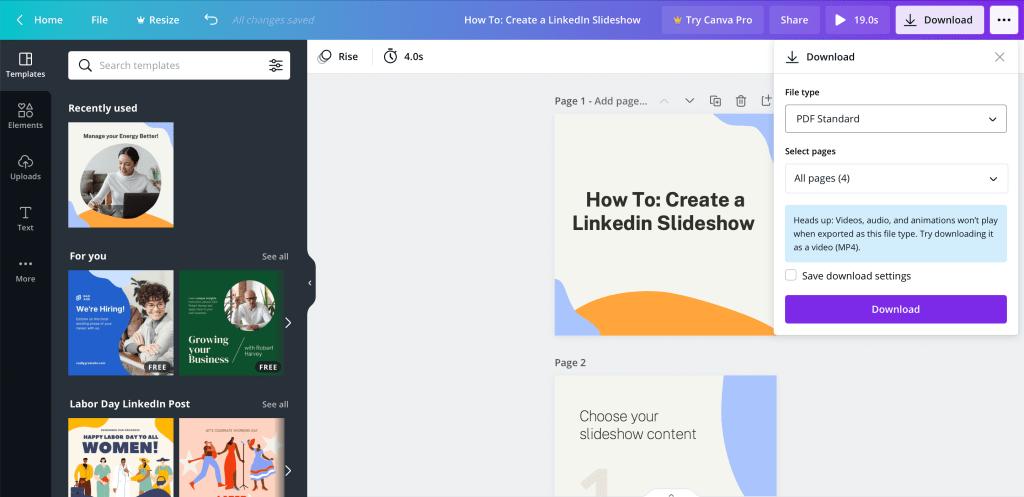
Once you’ve added all your content and built your slideshow, make sure to double-check and download it to your computer in a PDF format. Easy peasy.
And that takes us to…
Step 3: Upload Your Slideshow to LinkedIn
We’re in the final stretch! All that’s left to do is upload your beautiful slideshow to your LinkedIn profile which is the easiest part of this whole process.
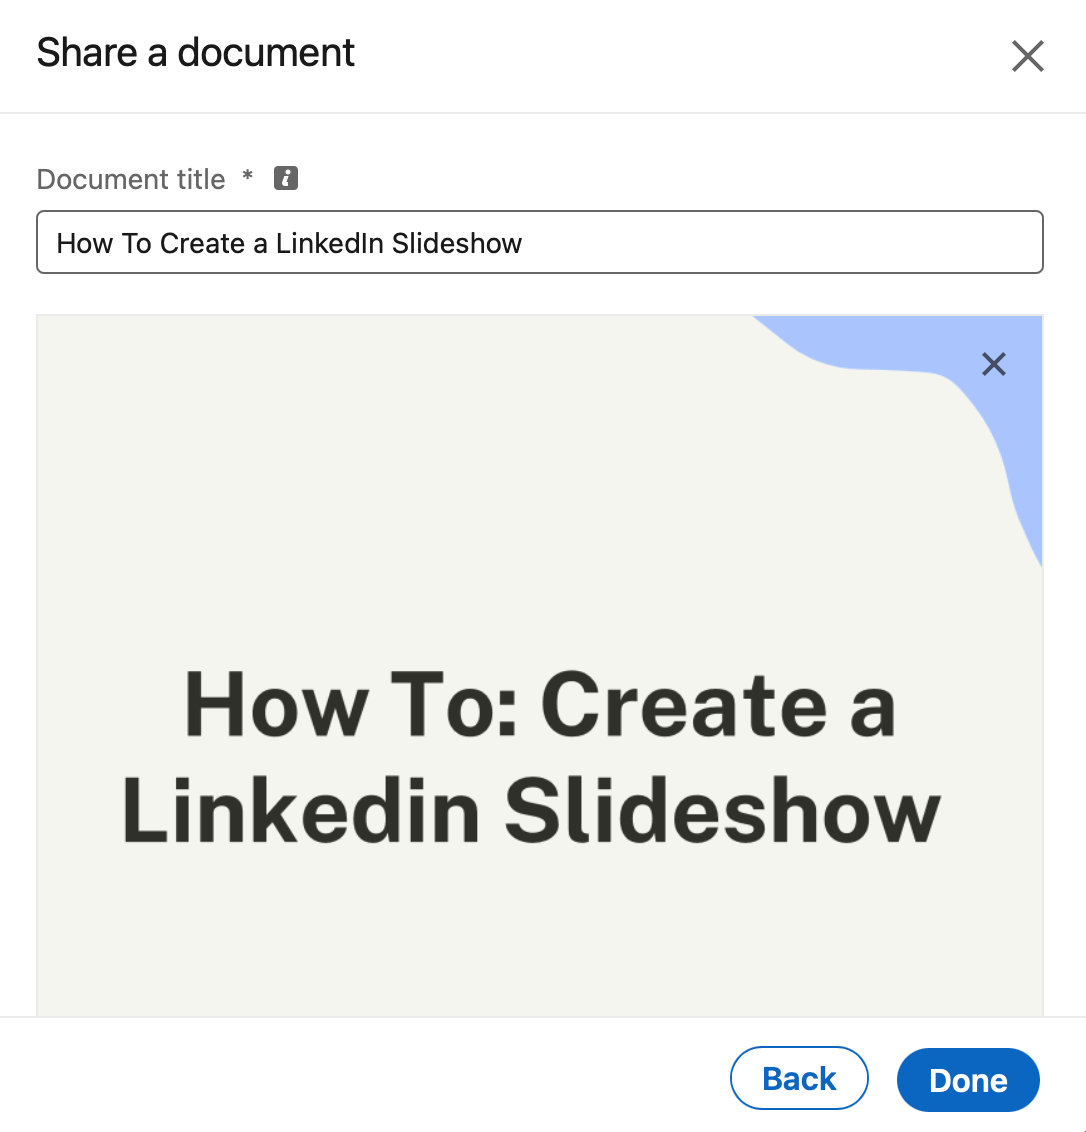
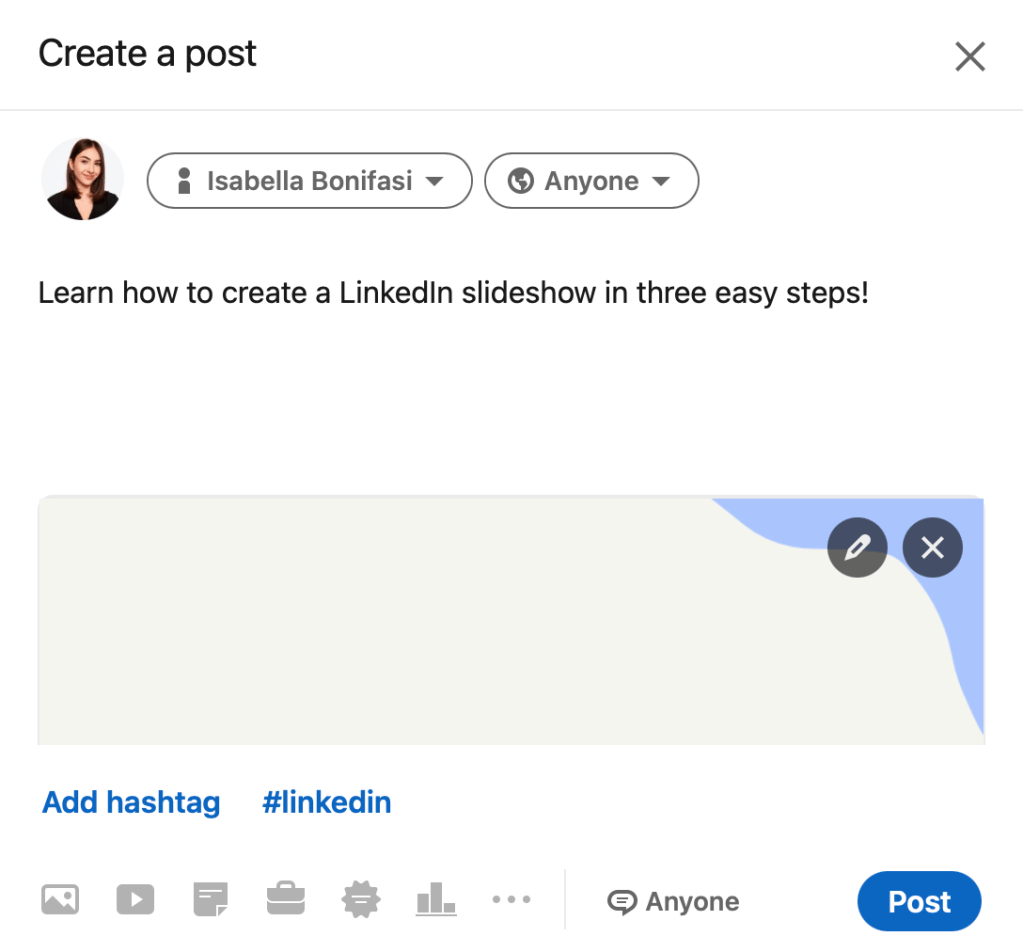
To upload your slideshow, click on ‘start a post’ at the top of your feed, and on the bottom left corner, click ‘add a document’. Once you’re there click ‘choose a file’ and upload the PDF slideshow you just created.

Make sure to give it a relevant title and write a caption for your post to add some context for your followers and voila: You’re ready to upload your slideshow.
I told you guys it was simple! Sure, it takes a few extra steps but the process is fairly easy and well worth it.
Don’t take my word for it? Try it out for yourself and see how your LinkedIn engagement skyrockets as you add more value to your followers and connections through fun slideshow posts!
